「Custom SRP」:直接光照与 Tiled Forward+
系列第 4 篇。承接 Note 1 的 Pass 框架与 Note 2 的几何提交链路。本篇关注的是”几何已经被画了,但着色器是怎么知道哪些光照亮它的”——从 CullingResults 到 StructuredBuffer 的 CPU→GPU 数据链路,以及现代 Forward+ 在屏幕空间分块剔除光源的完整机制。BRDF 的具体公式留给 Note 3,本篇只关心”光源信息如何到达 BRDF 输入端”。
TL;DR
- 数据链路:
CullingResults.visibleLights→DirectionalLightData[]/OtherLightData[]StructuredBuffer → Shader 按需读取。光源数量不再被 CBUFFER 数组上限制约——结构化缓冲打破了这条历史限制。 - 方向光走简单路径:数量少(典型 1-4 个),无需空间分块,Shader 端直接 for 循环遍历。
- 点光与聚光走 Forward+:屏幕分 Tile,每 Tile 预计算覆盖光源的索引列表。Shader 按像素的 Tile 坐标查表,只对命中光源做 BRDF 计算——把
O(像素 × 总光源数)降到O(像素 × 每 Tile 光源数)。 - 现代实现的工程选择:Catlike SRP 的 tile 剔除用 Burst Job + NativeArray 在 CPU 端完成,不是 Compute Shader。对于中等光源密度这是更简单、可调试、无 GPU 同步开销的路径。HDRP 与商业项目则采用 Compute Shader 以应对高密度场景。
- 物理光度学单位无感接入:Unity Physical Light Units 模式下,Directional 用 Lux、Point 用 Lumen、Spot 用 Lumen + Candela。引擎在
VisibleLight.finalColor完成转换,Shader 端只见到线性辐射度。
1. 光源数据:从 CullingResults 到 StructuredBuffer
1.1 数据结构定义
光源数据通过两个显式内存布局的 struct 传递到 GPU。结构必须 [StructLayout(LayoutKind.Sequential)],因为它们将被原样上传到 StructuredBuffer,C# 编译器不允许重排字段。
1 | |
directionAndMask.w 中的 rendering layer mask 是一个 uint 位掩码,但 StructuredBuffer 只能存浮点。技巧是用 asuint(mask) 在 Shader 端反读位模式——这样 32 位整数可以”借用”float 的存储槽。
1.2 LightingPass 数据收集
LightingPass.SetupLights 遍历可见光源,分类填充两个数组:
CSHARP
1 | |
要点:
VisibleLight.finalColor已经包含 intensity 与物理单位转换的结果——直接是线性 RGB 辐射度。- 同时为每个 point / spot 计算屏幕空间 light bounds,喂给后续的 ForwardPlusTilesJob。
- Rendering Layer 掩码在 CPU 阶段做粗筛,Shader 端再做精细比对(见 §5)。
1.3 StructuredBuffer 上传
光源数据在 LightingPass 中作为 Render Graph 资源声明:
1 | |
执行阶段通过 cmd.SetBufferData 把 NativeArray 内容上传:
1 | |
Shader 端通过 StructuredBuffer<DirectionalLightData> _DirectionalLightData 读取。声明和 C# 端必须严格一致:
1 | |
⚠️ 平台兼容性:StructuredBuffer 在 WebGL 1/2 上不支持。这意味着采用此架构的 Custom SRP 不能构建 WebGL 平台。WebGPU 支持但目前仍在演进。如果项目需要 WebGL 兼容,需要保留 CBUFFER 数组的旧式实现作为分支。
2. 方向光照模型
2.1 简单遍历策略
方向光的特点:作用范围无穷大(覆盖所有几何),但数量极少。一个标准游戏场景通常有 1 个主方向光(太阳/月亮)和 0-2 个辅助方向光(地面反射模拟、舞台灯效)。这个数量级远低于其他光源,没有必要做空间分块。
Shader 端直接遍历:
1 | |
_DirectionalLightCount 是个普通的 int CBUFFER 变量,配合循环上限 MAX_DIRECTIONAL_LIGHT_COUNT(典型为 4)让编译器知道循环边界,便于优化。
2.2 单光源贡献计算
GetLighting(surface, brdf, light) 是直接光照公式的统一入口,独立于光源类型:
1 | |
Light 是 Shader 端的统一抽象——无论原始光源是 directional / point / spot,到达 BRDF 时都被规约为这五个字段:
1 | |
light.attenuation 是关键的统一抽象——它把所有衰减因子(距离、角度、阴影、cookie)合并为一个标量乘子。Note 5 会展开 attenuation 中阴影部分的来源。
2.3 物理光度学单位
Unity 的 Player Settings 中的 Physical Light Units 开关决定光源强度的解释方式:
| 光源类型 | 默认单位 | 物理单位 |
|---|---|---|
| Directional | 任意线性强度 | Lux(lm/m²) |
| Point | 任意线性强度 | Lumen(lm,全方向辐射通量) |
| Spot | 任意线性强度 | Lumen 或 Candela(lm/sr) |
| Area | 任意线性强度 | Nits(cd/m²) |
启用物理单位后,引擎在内部把 Light.intensity 与单位类型一起打包,最终输出到 VisibleLight.finalColor 时已经是统一的线性 RGB 辐射度。Shader 端不需要任何额外转换代码——这是物理单位接入的优雅之处。
实践建议:项目一旦启用 HDR + Tone Mapping(Note 7),就应该启用物理单位。这能让 PBR 材质的反射结果与现实参考照片直接可比,降低美术调校的试错成本。
3. 点光与聚光:衰减模型
3.1 距离平方反比 + Range Attenuation
点光源的物理衰减遵循反平方定律 1/d²,但游戏渲染需要在 Light 的 Range 处把贡献平滑归零(否则会有突兀的边界)。Catlike 实现采用以下复合衰减形式:
其中
HLSL 实现:
1 | |
代码与公式的映射:
1 / max(distanceSqr, 0.00001)↔,物理反平方衰减带防除零下限 saturate(1 - d² × invSquareRange)↔,Range 边界软截断 - 末尾的
rangeAttenuation *= rangeAttenuation↔ 平方因子,确保边界处一阶导数也为零
invSquareRange 是 OtherLightData.position.w,Shader 省一次除法。整个衰减只需 1 次 dot、1 次 saturate、3 次乘法、1 次 max 和 1 次除法——是 BRDF 内循环的常驻热点路径,每一条指令都被精打细算。
3.2 聚光灯锥角衰减
聚光灯有内外两个锥角:内锥之内全亮、外锥之外全黑、之间平滑过渡。这通过两个预计算系数高效实现:
1 | |
1 | |
数学等价于 smoothstep(cosOuter, cosInner, cosTheta),但用线性插值 + 平方代替 smoothstep 的三次曲线,省两次乘加。
最终的总衰减是三者相乘:
1 | |
点光源没有锥角,spotAttenuation 设为 1 即可。
4. Tiled Forward+:屏幕空间光源剔除
4.1 设计动机
朴素 Forward 渲染的复杂度是 O(像素数 × 总光源数)。一个 1080p 屏幕配 64 个动态点光源,单帧着色器要执行 64 × 2M ≈ 1.3 亿次光照计算——绝大多数像素离绝大多数光源很远,贡献几乎为零,但 BRDF 仍然被完整计算并被距离衰减为 0。这是典型的”为不存在的贡献付出全额成本”。
Forward+ 的解决思路:先以屏幕 Tile 为粒度做一次粗剔除,每个 Tile 只保留实际覆盖它的光源索引。Shader 端遍历的不再是全部光源,而是当前像素所在 Tile 的命中列表——通常每 Tile 只有几个光源。复杂度从 O(像素 × 总光源) 降到 O(像素 × 每 Tile 平均光源),光源密度越高、收益越大。
4.2 整体数据流
flowchart TD
    A[CullingResults.visibleLights] --> B[SetupLights
遍历分类 + 预计算]

    B --> C[DirectionalLightData[]
NativeArray]
    B --> D[OtherLightData[]
NativeArray]
    B --> E[Light Screen Bounds[]
NativeArray]

    E --> F[ForwardPlusTilesJob
Burst 并行
每 Tile 测试覆盖]
    F --> G[TileData[]
NativeArray of int]

    C --> H[Directional Buffer]
    D --> I[Other Buffer]
    G --> J[Tiles Buffer]

    H --> K[Shader · 直接 for 循环]
    I --> L[Shader · Tile Lookup
+ 命中光源 for 循环]
    J --> L

    K --> M[BRDF 累加输出]
    L --> M

    style F fill:#fff3e0,stroke:#f57c00,stroke-width:2px
    style L fill:#e3f2fd,stroke:#1976d2,stroke-width:2px
    style M fill:#e8f5e9,stroke:#388e3c,stroke-width:2px
整个链路有三处资源同步点:
forwardPlusJobHandle.Complete()— Burst Job 必须在 SetBufferData 之前完成cmd.SetBufferData× 3 — 三个 buffer 上传时机- Shader 中
StructuredBuffer读取 — 实际消费
4.3 Tile 划分参数
Forward+ 的核心配置是 Tile 尺寸。Catlike 实现支持 16/32/64/128/256 像素的方形 Tile:
| Tile Size | 1080p 总 Tile 数 | 每 Tile 测试成本 | 适用场景 |
|---|---|---|---|
| 16×16 | ~8100 | 低 | 高密度光源、桌面端 |
| 32×32 | ~2025 | 中低 | 平衡选择 |
| 64×64 | ~510 | 中 | 默认,移动端推荐 |
| 128×128 | ~128 | 高 | 低密度光源 |
| 256×256 | ~32 | 极高 | 极少光源、调试用 |
权衡是 Tile 数 × 每 Tile 光源数的乘积。Tile 越小:剔除越精准(每 Tile 平均光源数低),但 Tile 总数多、CPU 端 Job 开销高、Shader 端 Tile lookup buffer 内存大。Tile 越大:Tile 数少,但每 Tile 命中率高,剔除粒度变粗。
64×64 是经验上的甜区——Job 工作量与剔除质量平衡得最好。如果项目光源密度极高(200+ 同屏),可以下调到 32×32。
4.4 ForwardPlusTilesJob:CPU 端 Burst 剔除
Catlike 实现的关键工程选择:tile 剔除用 Burst Job 在 CPU 端完成,不是 Compute Shader。
CSHARP
1 | |
并行调度:
1 | |
ScheduleParallel 把 Tile 按行分组并行处理,每组 tileCount.x 个 Tile。Burst 编译后的吞吐对几千个 Tile × 几十光源的工作量绰绰有余。
⚠️ Native 内存生命周期管理:通过
NativeArray在 CPU 端构建的光源数据数组(directionalLightData、otherLightData)、屏幕空间包围盒数组(lightBounds)、Tile 数据数组(tileData)都使用了Allocator.TempJob或Allocator.Persistent分配——它们不在 GC 管理范围内。LightingPass 必须在 Render Graph 执行完毕、Buffer 上传完成后正确调用Dispose()释放,且释放时机要等 Job 真正完成(forwardPlusJobHandle.Complete()之后)。在自定义渲染管线中,Native 内存泄漏是引发 Editor 崩溃与 Player 内存耗尽的最常见元凶。Job 在执行中 Dispose 会立即触发InvalidOperationException;忘记 Dispose 则在 Editor 退出 Play Mode 时泄漏告警,多次累积后可能直接 crash。安全 pattern 是把 Dispose 与 Buffer 上传打包在 Pass 的执行函数末尾,确保两者绑定。
剔除测试只是简单的 2D AABB 重叠——这是简化路线带来的精度损失:
- 点光源的世界空间球形包围盒投影到屏幕后是椭圆,但被简化为外接 AABB
- 聚光灯的锥形包围盒同样简化为屏幕 AABB
简化导致少量误判(Tile 被认为命中但实际光源贡献为零),但不会漏判(true positive 率 100%)——所以渲染结果永远正确,只是有少量冗余光照计算。这种”宁可多算不可少算”是剔除算法的安全设计。
4.5 Tile Data Buffer 结构
每个 Tile 在 buffer 中占 tileDataSize 个 int,第一个 int 是命中光源数 N,后面 N 个 int 是光源索引:
1 | |
tileDataSize = maxLightsPerTile + 1。Buffer 总大小 = tileCount × tileDataSize × 4 byte。1080p × 64 Tile × maxLight 32 大约是 65 KB——完全可以接受。
maxLightsPerTile 是配置项。Catlike 实现还有一个动态优化:每帧根据实际可见光源数量收缩 requiredMaxLightsPerTile = min(maxLightsPerTile, otherLightCount),减少 Job 工作量与上传带宽。
4.6 Shader 端的查询路径
Shader 端通过像素的 screen UV 反查 Tile,再读 Tile 命中列表:
HLSL
1 | |
_ForwardPlusTiles 是 StructuredBuffer<int>,Shader 端按 1D 索引访问。这种紧凑布局的好处:相邻 Tile 的数据在内存中也相邻,多个相邻像素并行访问时缓存命中率高。
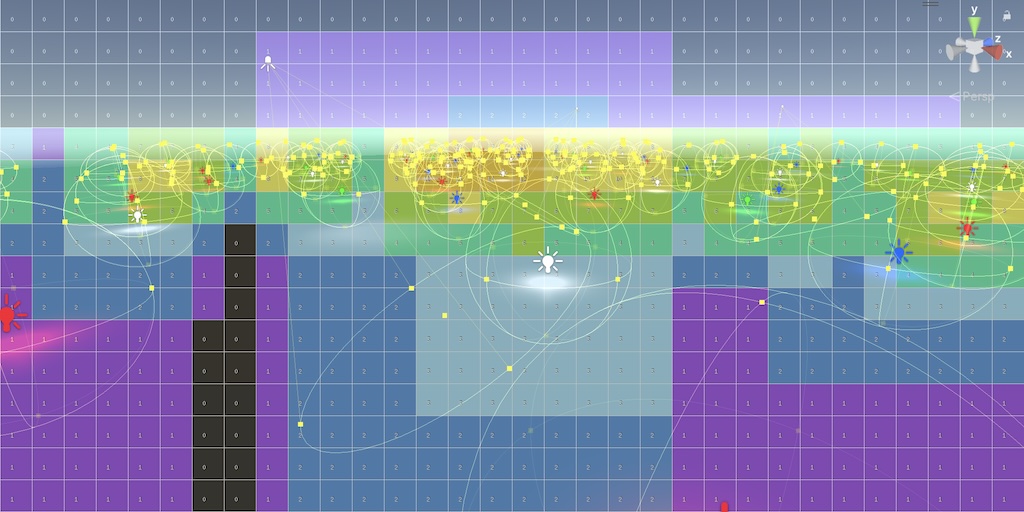
4.7 调试可视化:Heat Map
理解 Forward+ 收益的最直观方式是看 Tile 命中光源数的热力图。Catlike 实现一个独立的 ForwardPlusTilesPass,使用 RP Core Library 的 OverlayHeatMap 函数:
1 | |
输出叠加在主渲染上,Tile 边界清晰可见,颜色从蓝(少光源)到红(高密度)渐变,每个 Tile 中央显示具体数字。开启此调试 Pass 后能立刻发现:
- 哪些区域是光源密集热点(需要美术介入分散光源)
- 是否触及
maxLightsPerTile上限(红色饱和的 Tile 暗示有光源被丢弃) - 摄像机移动时 Tile 命中分布的稳定性
4.8 实现路线对比:CPU Job vs Compute Shader
Catlike 选 CPU Job 路径,HDRP 与商业项目(Frostbite、UE5)选 Compute Shader 路径。两者权衡如下:
| 维度 | CPU Burst Job(Catlike) | Compute Shader(HDRP) |
|---|---|---|
| 实现复杂度 | 低(单 Job 文件 ~50 行) | 高(多 kernel + 数据结构对齐) |
| 调试可见性 | 高(C# 断点 + Profiler) | 低(需 RenderDoc / GPU 调试器) |
| 同步开销 | Job complete + Buffer 上传 | GPU 内部同步,无 CPU↔GPU 往返 |
| 光源数量上限 | ~256 是舒适区 | 几千光源仍流畅 |
| 复杂剔除(截锥锥相交) | 难以扩展 | 天然支持 |
| 平台覆盖 | 全平台(包含 GLES2) | 需 Compute Shader 支持 |
| 适用项目 | 教学、独立、中等密度场景 | 3A、高密度光源、HDRP 类型 |
CPU 路径在中等密度(< 100 光源)下完全够用且可控性强。Compute Shader 路径只在光源密度超过 CPU 处理上限时才有必要——但项目一旦切到 Compute Shader,整个 Lighting Pass 的复杂度会显著上升(buffer barrier、indirect dispatch、light list 的两阶段构造等)。Custom SRP 选 CPU 路径是教学友好与运行时简洁的合理折中。
📱 移动端的隐藏决定权:除了实现复杂度,中低端移动端设备对 Compute Shader 的支持一直是个雷区。OpenGL ES 3.1 才正式引入 Compute,而东南亚、印度、南美等关键市场仍有大量 GLES 3.0 设备在服役;即使是支持 Compute 的设备,不同厂商驱动对 SSBO 写入屏障、原子操作、shared memory 大小的实现差异常导致同一份 shader 在 A 设备跑得飞快、B 设备直接花屏甚至 GPU 死锁。Vulkan 在移动端的覆盖虽逐年提升,但驱动 bug 与厂商定制层依然是稳定性盲区。采用 Burst 编译的 CPU Job 配合 NativeArray,不仅避开了 GPU 端复杂的 Barrier 同步,更彻底免疫了移动端 Compute Shader 的硬件兼容性问题——CPU 端的并行调度是图形 API 无关的,Burst 后端会自动针对 ARM NEON 或 x86 SSE 生成最优代码。对于面向广覆盖移动市场的项目,这是极具性价比的工程折中方案。
5. RenderingLayer 与光源遮罩
RenderingLayer 是 Unity 6 引入的 32 位光源-对象交互过滤机制。每个 Renderer 和每个 Light 都有 renderingLayerMask 字段,只有两者按位与不为零时该光源才贡献到该对象。
应用场景:
- Per-Camera 光源屏蔽:UI 相机不接受场景光源,第一人称武器只接受专属补光。
- 多角色独立打光:剧情过场中,主角接收聚光灯但 NPC 接收常规环境光。
- 动态/静态分组:动态对象只用实时光,静态对象用 Lightmap,避免双重计算。
数据流:
- C# 端:
OtherLightData.directionAndMask.w = asfloat(light.renderingLayerMask) - Shader 端:
asuint(directionAndMask.w) & surface.renderingLayerMask
1 | |
surface.renderingLayerMask 来自 unity_RenderingLayer.x(在 UnityPerDraw CBUFFER 中),由引擎为每个 Renderer 自动填充。
6. TA Takeaway
6.1 Forward+ 的复杂度模型
Forward+ 的核心 trade-off 是用 CPU/GPU 预处理换 Shader 内循环减少。两端的成本必须放在一起计算:
- CPU 预处理成本:
O(Tile 数 × 光源数)的 AABB 重叠测试 - Shader 端节省:每像素从
O(总光源数)降到O(每 Tile 光源数) - 总收益:与每 Tile 平均命中数 / 总光源数的比例成正比
只有在光源数足够多(> 16 个 point/spot)时收益才显著。光源极少时(< 8 个)Forward+ 反而是负优化——Tile 准备开销超过遍历节省。这也是为什么 Catlike 实现仍保留方向光的简单遍历路径——方向光数量天然少,分块没意义。
6.2 方向光与点光分而治之的工程意义
把方向光从 Forward+ 系统中剥离是一个常被忽视但收益巨大的工程决策:
- 方向光覆盖整个场景,Tile 剔除对它没有收益(每个 Tile 都命中)
- 方向光数量少(≤ 4),简单数组遍历 + CBUFFER 数据是最优形态
- 强行让方向光走 Forward+ 路径会让 Tile Buffer 浪费 N 倍存储(每个 Tile 都列入所有方向光)
这种”按光源类型分而治之”的架构在 HDRP 与 URP 中也是同样选择。Forward+ 只解决”局部光源”的剔除问题,”全局光源”自有更直接的处理方式。
6.3 数据传递的现代化收益
把光源数据从 CBUFFER 数组迁移到 StructuredBuffer 看似只是 API 变化,实际上消除了三个工程痛点:
- 打破固定数量上限:不再有
MAX_OTHER_LIGHT_COUNT = 64这类硬编码常量 - 结构化访问:
_OtherLightData[i].position比_OtherLightPositions[i]更易读、更易扩展 - Shader 关键字爆炸抑制:原本可能为不同光源数量编译多个 variant,现在统一一套代码
代价是 WebGL 1/2 不支持。这个权衡在现代项目中容易选——WebGL 在重度图形项目里本就罕用。
6.4 实践原则
- 光源密度上限做规划:在项目早期就确定每场景动态光源上限(典型 32-64),并作为美术约束写入设计文档。Forward+ 的
maxOtherLightCount应略高于此值留余量。 - Heat Map 是日常工具:在调试场景里默认开启 Tile heat map,光照美术调灯时能立刻看到光源溢出风险。
- 优先优化光源 Range:缩小光源 Range 比增加 Tile 细分更直接——每光源覆盖 Tile 数减半,剔除收益翻倍。
- 方向光数量严守 ≤ 4:超出会让
MAX_DIRECTIONAL_LIGHT_COUNT编译期循环失效,shader 性能急剧下降。 - 不要混用 Forward+ 与 per-object 光源索引:Custom SRP 在 3.2.0 版本已移除 lights-per-object 路径——历史遗留的双路径只会让 Pass 复杂度翻倍而无收益。
关键 API 速查
1 | |
1 | |