体积云实时渲染解析
发布于2026-03-15 · 更新于2026-03-15
#体积渲染#RayMarching
笔者 3 月份参考不同体积云项目和各种论文实现了一套基于物理的体积云 Unity URP渲染系统,现在就一些核心实现进行梳理,理论细节见下述链接。
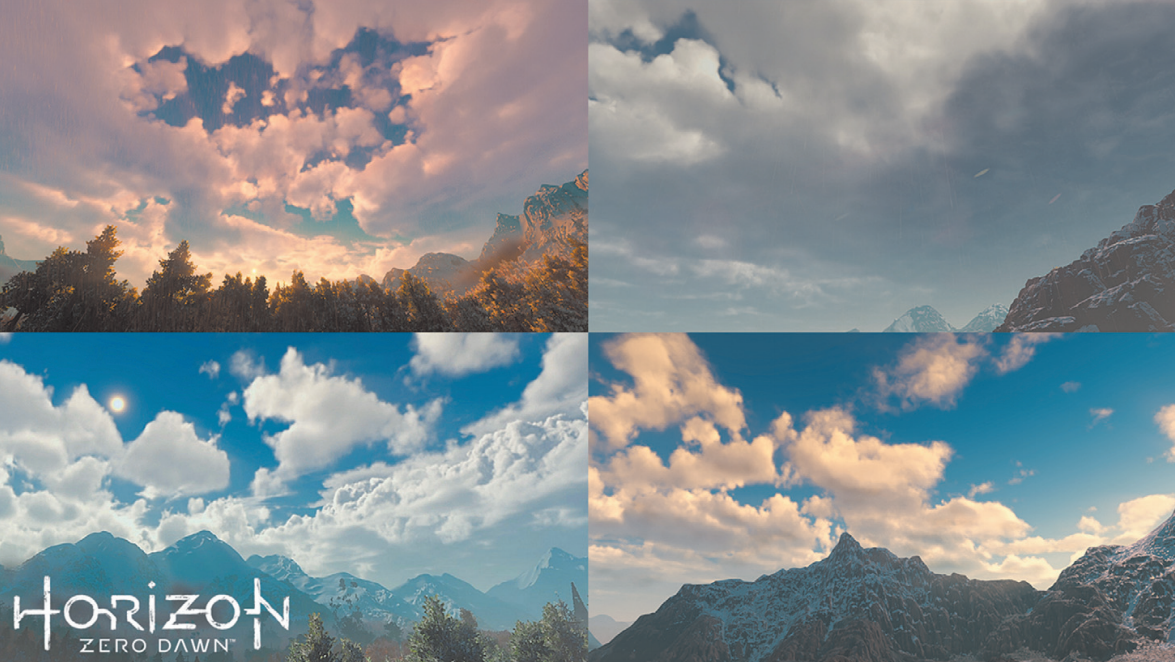
Horizon: Zero Dawn 体积云系统解析
概述
体积云渲染的核心在于模拟光线与云层介质(微小水滴或冰晶)之间的物理交互。通过 体积光线步进(Volumetric Raymarching),我们可以将复杂的物理现象简化为两个关键指标的计算:
- 透射率(Transmittance):衡量光线穿过云层后剩余能量的比例。它遵循比尔-朗伯定律(Beer-Lambert Law)。随着云层密度或步进距离的增加,能量呈指数级衰减,产生“吸收”和“遮挡”的效果。
- 散射(Scattering):云层并非只是吸收光线,它还会被光源照亮。
- 内散射(In-Scattering):外界光源(如太阳)进入云层内部,经过多次碰撞后转向观察者的方向,使云朵看起来洁白或发光。
- 相函数(Phase Function):决定光线散射的方向性(例如前向散射会产生明亮的边缘晕光)。
在光线从点 (远端)步进到点 (观察点)的过程中,最终亮度由两部分组成:
- 背景光的衰减:背景色 累积透射率。
- 散射光的累积:每一步步进点产生的散射光 该点到相机的透射率。
简要的渲染方程可以理解为:
1
| float3 finalColor = transmittance * skyBakgroundColor + scattering;
|
主要渲染流程伪代码如下:
RenderCloud
1
2
3
4
5
6
7
8
9
10
11
12
13
14
15
16
17
18
19
20
21
22
23
24
25
26
27
28
29
30
31
32
33
34
35
36
37
38
39
40
41
42
43
44
45
46
47
48
49
50
51
52
53
54
55
56
57
58
59
60
61
62
63
64
65
66
67
68
69
70
71
72
73
74
75
76
77
78
|
float hgPhase(float g, float cosTheta)
{
float numer = 1.0f - g * g;
float denom = 1.0f + g * g + 2.0f * g * cosTheta;
return numer / (4.0f * kPI * denom * sqrt(denom));
}
float dualLobPhase(float g0, float g1, float w, float cosTheta)
{
return mix(hgPhase(g0, cosTheta), hgPhase(g1, cosTheta), w);
}
float transmittance = 1.0f;
vec3 scattering = vec3(0.0f);
vec3 rayHitPos = vec3(0.0);
float rayHitPosWeight = 0.0;
vec3 stepPosition = a;
while(a->b)
{
float stepCloudDensity = sampleCloud(stepPosition);
float stepTransmittance = exp(-stepCloudDensity * dt);
rayHitPos += samplePos * transmittance;
rayHitPosWeight += transmittance;
float sunPhase = dualLobPhase(0.5, -0.5, 0.2, -VoL);
vec3 sunVisStep = stepPosition;
float sunVisibility = 1.0f;
for(uint j = 0; j < kStepLight; j++)
{
float stepLitDensity = sampleDensity(sunVisStep);
sunVisibility *= exp(-stepLitDensity * dStepLight);
sunVisStep += dStepLight * sunDirection;
}
vec3 stepScattering = sunColor * sunAtmosphereTransmittance * sunPhase * sunVisibility;
vec3 sigmaS = vec3(stepCloudDensity);
vec3 sigmaS = vec3(stepCloudDensity);
const float sigmaA = 0.0;
vec3 sigmaE = max(vec3(1e-8f), sigmaA + sigmaS);
vec3 sactterLitStep = stepScattering * sigmaS;
sactterLitStep = transmittance * (sactterLitStep - sactterLitStep * stepTransmittance);
sactterLitStep /= sigmaE;
scattering += sactterLitStep;
stepPosition += dt * dir;
transmittance *= stepTransmittance;
}
rayHitPos /= rayHitPosWeight;
vec3 finalColor = transmittance * skyBakgroundColor + scattering;
|
注:寒霜引擎 (Frostbite) 在 2017 年提出的能量守恒解析积分公式
一、 云的形态与密度建模 (Procedural Density Modeling)
体积云并非使用网格模型,而是通过数学公式在三维空间中实时“雕刻”出的密度场。项目通过多层数据叠加来定义任意一点的云密度:
- 宏观分布与天气图 (Weather Map & Curl Noise): ``,云层的分布由一张 2D 的天气图(Weather Texture)控制,其 R 通道定义了基础覆盖率。为了打破分布的均匀感,引入了 Curl Noise(旋涡噪声)进行低频的局部扰动,使云团分布更加自然。
- 基础形状 (Base Shape): 使用预计算的 3D Perlin-Worley 噪声纹理。Perlin 噪声提供连绵的起伏感,Worley 噪声产生细胞状的团块,两者结合构成了积云厚重的大尺度轮廓。
- 边缘侵蚀与高度调制 (Detail Erosion & Height Gradient): 高频的 3D Worley 噪声用于刻画云的边缘细节。这里采用高度变量(
normalizeHeight):在云层底部,细节噪声正向叠加,增加云底的厚重与蓬松感;而在高空,噪声被反转(1 - detailNoiseComposite),从而“侵蚀”出破碎、絮状的卷云边缘。
- 云层垂直剖面: 通过定义不同高度下的密度映射,使得云底(0
10%)快速变厚,云顶(80%100%)平滑淡出,形成了典型的积雨云“砧状”结构。
这里的实现相对于 地平线方案有一定简化,后续可以细化。
SampleCloudDensity
1
2
3
4
5
6
7
8
9
10
11
12
13
14
15
16
17
18
19
20
21
22
23
24
25
26
27
28
29
30
31
32
33
34
35
36
37
38
39
40
41
42
43
44
45
46
47
48
49
50
51
52
53
54
55
56
57
58
59
60
61
62
63
| float remap(float value, float orignalMin, float orignalMax, float newMin, float newMax)
{
return newMin + (saturate((value - orignalMin) / (orignalMax - orignalMin)) * (newMax - newMin));
}
float SampleCloudDensity(float3 worldPos, float normalizeHeight)
{
const float kCoverage = frameData.sky.cloudConfig.CloudCoverage;
const float kDensity = frameData.sky.cloudConfig.CloudDensity;
const float kCloudNoiseScale = frameData.sky.cloudConfig.CloudNoiseScale;
const float3 windDirection = normalize(frameData.sky.cloudConfig.CloudDirection);
const float cloudSpeed = frameData.sky.cloudConfig.CloudSpeed;
float3 posMeter = worldPos + windDirection * normalizeHeight * 500.0f;
float3 windOffset = (windDirection + float3(0.0, 0.1, 0.0)) * _Time.y * cloudSpeed;
float3 posKm = posMeter * 0.001;
float2 sampleUv = kCloudNoiseScale * posKm.xz * frameData.sky.cloudConfig.CloudWeatherUVScale * 0.01 + windOffset.xz * 0.001;
float4 weatherValue = inWeatherTexture.SampleLevel(linearRepeatSampler, sampleUv, 0);
float localCoverage = inCloudCurlNoise.SampleLevel(linearRepeatSampler,(kCloudNoiseScale * _Time.y * cloudSpeed * 50.0 + posMeter.xz) * 0.000001 + 0.5, 0).x;
localCoverage = saturate(localCoverage * 3.0 - 0.75) * 0.2;
float coverage = saturate(kCoverage * (localCoverage + weatherValue.x));
float gradienShape = remap(normalizeHeight, 0.00, 0.10, 0.1, 1.0) * remap(normalizeHeight, 0.10, 0.80, 1.0, 0.2);
float cloudBasicNoiseScale = frameData.sky.cloudConfig.CloudBasicNoiseScale;
float basicNoise = inBasicNoise.SampleLevel(sampler_TrilinearRepeat, kCloudNoiseScale * posKm * cloudBasicNoiseScale + windOffset, 0).r;
float basicCloudNoise = gradienShape * basicNoise;
float basicCloudWithCoverage = coverage * remap(basicCloudNoise, 1.0 - coverage, 1, 0, 1);
float3 sampleDetailNoise = posKm - windOffset * 0.15;
float cloudDetailNoiseScale = frameData.sky.cloudConfig.CloudDetailNoiseScale;
float detailNoiseComposite = inDetailNoise.SampleLevel(linearRepeatSampler, kCloudNoiseScale * sampleDetailNoise * cloudDetailNoiseScale, 0).r;
float detailNoiseMixByHeight = 0.2 * lerp(detailNoiseComposite, 1 - detailNoiseComposite, saturate(normalizeHeight * 10.0));
float densityShape = saturate(0.01 + normalizeHeight * 1.15) * kDensity *
remap(normalizeHeight, 0.0, 0.1, 0.0, 1.0) *
remap(normalizeHeight, 0.8, 1.0, 1.0, 0.0);
float cloudDensity = remap(basicCloudWithCoverage, detailNoiseMixByHeight, 1.0, 0.0, 1.0);
float density = saturate(pow(cloudDensity * densityShape, 2.0));
density = pow((saturate(density)), 2);
return density;
}
|
二、 基于物理的体积光照 (Volumetric Lighting Model)
云的光照基于辐射传输方程(Radiative Transfer Equation),但完整求解代价极高,我们采用了多种极其精妙的近似算法来模拟光线在水滴微粒间的复杂散射。
改进的比尔定律 (Beer-Lambert Law):
纯 Beer’s Law光线衰减遵循 。而在工程实践中,为了改善云层边缘过渡死板的问题,引入了 Siggraph 2017 提出的改良版公式:max(exp(-opticalDepth), exp(-opticalDepth * 0.25) * 0.7),让云层边缘更具透光性。:
1
2
3
4
5
6
|
float stepTransmittance = max(
exp(-opticalDepth),
exp(-opticalDepth * 0.25) * 0.7
);
|
双叶相函数 (Dual-Lobe Henyey-Greenstein):
- 真实云朵同时具备强烈的前向散射和一定的后向散射。系统混合了两个 HG 相函数:强前向散射产生云边缘面对太阳时的“银边”(Silver Lining)高光;后向散射则保留了云层背光面的柔和体积感。
1
2
3
4
5
6
7
8
9
10
11
12
|
float hgPhase(float g, float cosTheta)
{
float numer = 1.0f - g * g;
float denom = 1.0f + g * g + 2.0f * g * cosTheta;
return numer / (4.0f * kPI * denom * sqrt(denom));
}
float dualLobPhase(float g0, float g1, float w, float cosTheta)
{
return lerp(hgPhase(g0, cosTheta), hgPhase(g1, cosTheta), w);
}
|
粉末效应 (Powder Effect):
粉末效应是指云层边缘因为多重散射较弱,反而看起来发黑的物理现象; 由于单次散射在浓密云层中会导致核心过度黑暗,地平线引入了 Powder Effect 来模拟多次散射带来的内部亮度。项目中基于光照角度和深度概率计算出该修正因子,使得云层内部看起来更加“通透”和“蓬松”。
1
2
3
4
5
6
7
8
9
10
11
12
13
14
15
16
17
18
19
20
|
float powderEffectNew(float depth, float height, float VoL)
{
float r = VoL * 0.5 + 0.5;
r = r * r;
height = height * (1.0 - r) + r;
return depth * height;
}
float powderEffect;
{
float depthProbability = pow(
clamp(stepCloudDensity * 10.0, 0.0, 1.0),
remap(normalizeHeight, 0.3, 0.85, 0.5, 2.0));
depthProbability += 0.05;
float verticalProbability = pow(remap(normalizeHeight, 0.07, 0.22, 0.1, 1.0), 0.8);
powderEffect = powderEffectNew(depthProbability, verticalProbability, VoL);
}
|
视觉效果:粉末效应让积云底部呈现真实的深色平台,而云边缘(侧光)产生”糖粉”般的细腻明暗变化。CloudPowderScale和CloudPowderPow两个参数可在 Inspector 实时调节。
多重散射积分 (Multiple Scattering Octaves)
真实云的白色来自光在无数水滴间的多重散射。单次散射会让云看起来过暗,多重散射近似是解决方案。
本项目采用基于层级(Octaves)的经验模型:每一级散射使得消光系数呈指数降低(光遇到的阻力变小)。同时,利用能量守恒积分替代了简单的步进累加,大幅消除了噪点瑕疵。
1
2
3
4
5
6
7
8
9
10
11
12
13
14
15
16
17
18
19
20
21
22
23
24
25
|
float sigmaS = stepCloudDensity;
float sigmaE = max(sigmaS, 1e-8f);
scatteringCoefficients[0] = sigmaS * CloudAlbedo;
extinctionCoefficients[0] = sigmaE;
float MsExtinctionFactor = CloudMultiScatterExtinction;
float MsScatterFactor = CloudMultiScatterScatter;
for (int ms = 1; ms < kMsCount; ms++) {
extinctionCoefficients[ms] = extinctionCoefficients[ms-1] * MsExtinctionFactor;
scatteringCoefficients[ms] = scatteringCoefficients[ms-1] * MsScatterFactor;
MsExtinctionFactor *= MsExtinctionFactor;
MsScatterFactor *= MsScatterFactor;
}
if (CloudEnableGroundContribution != 0) {
participatingMediaAmbient = GetLightTransmittance(
samplePos, float3(0, 1, 0), -1, kSkyMsExition
);
}
|
物理解释:弹射次数越多(ms 越大),光感受到的”阻力”越小——这正解释了为什么厚云的边缘由于多次内部折射而透亮。kMsCount(通常 2–3)是性能与质量的权衡旋钮。
空气透视融合 (Aerial Perspective)
最后,利用步进累加出的深度值,采样大气散射预计算的 3D LUT,将大气雾的颜色与云层混合,使云完美融入天际线,并在 Opaque 物体前进行正确的深度剔除与 Alpha 预乘合成。
1
2
3
4
5
6
7
8
9
10
11
12
13
14
15
16
17
18
19
20
21
22
23
24
25
26
27
28
29
30
31
32
33
34
35
36
37
38
39
40
41
42
43
44
| if (rayHitPosWeight > 0.0f)
{
rayHitPos /= rayHitPosWeight;
float3 rayHitInRender = convertToCameraUnit(rayHitPos - float3(0.0, earthRadius, 0.0));
float4 rayInH = mul(_PreviousCameraVP, float4(rayHitInRender, 1.0));
cloudZ = rayInH.z / rayInH.w ;
rayHitPos -= worldPos;
float rayHitHeight = length(rayHitPos);
{
float dis = length(rayHitPos *1000.0f - _WorldSpaceCameraPos);
float dis01 = saturate(dis / _AerialPerspectiveDistance);
float dis0Z = dis01 * (_AerialPerspectiveVoxelSize.z - 1);
float slice = floor(dis0Z);
float weight =1.0;
if (slice < 0.5)
{
weight = saturate(slice *2.0);
slice =0.5;
}
float nextSlice = min(slice + 1, _AerialPerspectiveVoxelSize.z - 1);
float lerpFactor = dis0Z - floor(dis0Z);
uv.x /= _AerialPerspectiveVoxelSize.x;
float2 uv1 = float2(uv.x + slice / _AerialPerspectiveVoxelSize.z, uv.y);
float2 uv2 = float2(uv.x + nextSlice / _AerialPerspectiveVoxelSize.z, uv.y);
float4 data1 = SAMPLE_TEXTURE2D(_aerialPerspectiveLut, sampler_LinearClamp, uv1);
float4 data2 = SAMPLE_TEXTURE2D(_aerialPerspectiveLut, sampler_LinearClamp, uv2);
float4 airPerspective =weight * lerp(data1, data2, lerpFactor);
airPerspective.a =saturate(airPerspective.a -0.6f);
scatteredLight = scatteredLight * (1.0 - airPerspective.a) + airPerspective.rgb * (1.0 - transmittance);
}
}
|
三、 渲染管线与性能优化 (Pipeline & Optimization)
这套渲染流程执行在渲染天空盒后,包含了 3Pass。同时因为纯粹的光线步进开销极大,这套方案在 Unity URP 中的工程实现展现了激进的优化策略。
Cloud Marching
三级 Early Exit
1
2
3
4
5
6
7
8
|
if (bEarlyOutCloud) return half4(0, 0, 0, 1);
if (basicCloudWithCoverage <= 0.0) return 0.0;
if (transmittance <= 0.001) break;
|
球面相交与自适应步长
- 系统构建了一个包裹星球的大气球壳。发射射线时,首先通过
hitSphereInside/hitSphereOutside精确计算射线进入和离开云层的距离,严格限制步进范围。向太阳步进采样阴影时,步长(stepL)会成倍增加,快速跳出云层以节省算力。
1
2
3
4
5
6
7
8
9
10
11
12
13
14
15
16
17
18
19
20
21
22
23
24
25
26
27
28
29
30
31
32
33
34
35
36
37
38
39
40
41
42
43
44
45
46
47
48
49
50
51
52
53
54
55
56
57
58
59
60
61
62
63
64
65
66
67
68
69
70
71
|
float tMin;
float tMax;
bool bEarlyOutCloud = false;
{
if (viewHeight < radiusCloudStart)
{
if (hitSphereNearest(CameraPosWSEarthKm, worldDir, earthRadius) > 0.0)
{
bEarlyOutCloud = true;
}
tMin = hitSphereInside(CameraPosWSEarthKm, worldDir, radiusCloudStart);
tMax = hitSphereInside(CameraPosWSEarthKm, worldDir, radiusCloudEnd);
}
else if (viewHeight > radiusCloudEnd)
{
float2 tEnd = float2(0.0, 0.0);
if (!hitSphereOutside(CameraPosWSEarthKm, worldDir, radiusCloudEnd, tEnd))
{
bEarlyOutCloud = true;
}
else
{
float2 tStartOuter = float2(0.0, 0.0);
if (hitSphereOutside(CameraPosWSEarthKm, worldDir, radiusCloudStart, tStartOuter))
{
tMin = tEnd.x;
tMax = tStartOuter.x;
}
else
{
tMin = tEnd.x;
tMax = tEnd.y;
}
}
}
else
{
float tHitStart = hitSphereNearest(CameraPosWSEarthKm, worldDir, radiusCloudStart);
if (tHitStart > 0.0)
{
tMax = tHitStart;
}
else
{
tMax = hitSphereInside(CameraPosWSEarthKm, worldDir, radiusCloudEnd);
}
tMin = 0.0f;
}
tMin = max(tMin, 0.0);
tMax = max(tMax, 0.0);
if (tMax <= tMin || tMin > (frameData.sky.cloudConfig.CloudTracingStartMaxDistance))
{
bEarlyOutCloud = true;
}
}
|
蓝噪声抖动 (Blue Noise Dithering)
- 射线步进的起始位置加入了一个微小的蓝噪声偏移。这把严重的光栅化断层(Banding)打散成了高频的细碎噪点,极大地提高了视觉质量,并为后续的时域抗锯齿做准备。
1
2
3
4
5
6
7
8
9
10
11
12
13
14
15
|
uint2 offset = uint2(float2(0.754877669, 0.569840296) * (frameData.frameIndex.x) * uint2(_ScreenParams.xy));
uint2 pixelCoord = uint2(uv * _ScreenParams.xy);
uint2 offsetId = pixelCoord + offset;
offsetId.x = offsetId.x % BLUE_SIZE;
offsetId.y = offsetId.y % BLUE_SIZE;
float blueNoise = inBlueNoise.SampleLevel(linearRepeatSampler, offsetId / BLUE_SIZE, 0).r;
const uint stepCountUnit = frameData.sky.cloudConfig.CloudMarchingStepNum;
const float stepCount = float(stepCountUnit);
float stepT = (tMax - tMin) / stepCount + 0.001;
float sampleT = tMin + 0.001 * stepT;
sampleT += stepT * blueNoise;
|
锥形光照采样
直接向太阳方向步进 32+ 次代价极高,锥形采样用 6 次 + 递增步长 近似:
1
2
3
4
5
6
7
8
9
10
11
12
13
|
float d = stepL * 0.5;
float stepL = CloudLightBasicStep;
for (uint j = 0; j < kStepLight; j++) {
float3 samplePosKm = posKm + sunDirection * d;
extinctionAccumulation[0] += SampleCloudDensity(...) * stepL;
d += stepL;
stepL *= kStepLMul;
}
|
大气透射率 LUT 插值优化
大气透射率的完整求解需要对 LUT 进行 per-step 采样,关键优化:只在起点和终点各采样一次,循环内线性插值:
1
2
3
4
5
6
7
8
9
10
|
float3 atmosphereTransmittance0 = inTransmittanceLut.SampleLevel(...);
float3 atmosphereTransmittance1 = inTransmittanceLut.SampleLevel(...);
float3 atmosphereTransmittance = lerp(
atmosphereTransmittance0,
atmosphereTransmittance1,
saturate(sampleT / marchingDistance)
);
|
Cloud Reconstruction Pass
时间重投影与时域重建 (Temporal Reconstruction) 是系统性能的核心。主光线步进仅在 1/4 分辨率 下执行。在全分辨率合成阶段,将 1/4 低分辨率 的当前帧云层渲染结果,结合全分辨率的历史帧,通过时间重投影(Temporal Reprojection)、Bayer 矩阵分帧更新和3x3 邻域方差裁剪(AABB Clipping),重建出平滑、无拖尾的全分辨率云层图像。
如果发现深度突变(如云边缘快速移动),则立刻丢弃历史缓冲防止拖尾残影,相当于 16 帧渲染完一次体积云。
核心算法流程解析
第一步:运动向量与历史 UV 计算
- 原理:利用当前像素的屏幕坐标
uv和深度curDepthZ,反推出世界空间坐标worldPosCur。
- 重投影:将世界坐标乘以上一帧的 VP 矩阵 (
_PreviousCameraVP),计算出该像素在上一帧屏幕上的位置uvPrev。
- 有效性检测:检查
uvPrev是否在屏幕范围内[0, 1],且当前帧没有发生相机切换(bCameraCut)。如果不满足,则判定历史失效。
第二步:深度断层剔除 (Anti-Ghosting)
- 代码:
if (abs(preDepthZ - curDepthZ) > 0.05)
- 作用:非常关键的防拖尾策略。当云层边缘移动过快,或者前后景发生遮挡时,当前深度与历史深度差异过大,此时强行混合会产生严重的残影(Ghosting)。遇到这种情况,直接丢弃历史帧,100% 使用当前帧数据。
第三步:Bayer 矩阵交错更新 (Temporal Upsampling)
- 原理:为了节省性能,当前帧只在 1/4 分辨率下渲染。代码通过一个 的 Bayer 矩阵(
kBayerMatrix16),将全分辨率屏幕划分为 的区块。
- 策略:每帧在 的区块中,只有 1 个像素(
bUpdateEvaluate为 true 时)会执行高代价的 邻域采样和完整的 TAA 混合逻辑。这意味着一个像素完整的物理更新周期是 16 帧。
第四步:3x3 邻域方差裁剪 (Variance Clipping)
- 触发条件:当轮到当前像素更新时(
bUpdateEvaluate == true)。
- 过程:
- 统计量计算
加权求和:以高斯权重()对当前帧低分辨率图像进行 邻域采样。
期望与标准差:
颜色均值(Ex):
颜色平方的均值(Ex2):
标准差(Dev):
- 构建颜色包围盒(AABB):
注意:代码中boxSize = 2.5是一个经验参数。值越小,抗拖尾越强(但易闪烁);值越大,画面更稳(但易产生鬼影)。
- 将历史颜色
**preColor** 限制(Clamp)在这个包围盒内。
1
2
| float4 clampColorHistory = clamp(preColor, nmin, nmax);
finalColor = lerp(clampColorHistory, curColor, 0.5);
|
- 目的:确保历史颜色不会偏离当前帧邻域颜色太多,这是 TAA 算法中消除残影的核心技术。最后将 Clamp 后的历史颜色与当前颜色按 5:5 混合(
lerp(..., 0.5))。
第五步:EMA 滤波平滑 (防马赛克/噪点)
- 触发条件:未轮到当前像素更新时。
- 代码:
finalColor = lerp(preColor, curColor, 0.03)
- 作用:即使像素这帧不进行完整的方差裁剪计算,也强制拉取 3% 的当前帧颜色进行指数移动平均(EMA)融合。
- 亮点:如果仅依靠 Bayer 矩阵更新,相机静止时画面容易卡在旧状态,产生明显的点状抖动(Stippling)或棋盘格马赛克。这 3% 的微小冲刷可以持续柔和地刷新画面,提升静止画面的平滑度。
EMA,全称 Exponential Moving Average(指数移动平均),是一种在序列数据中极其常用的平滑滤波算法。它的核心思想是:给予近期的数据更高的权重,而历史数据的权重会随着时间推移呈“指数级”衰减。
与简单的算术平均(SMA,把所有历史数据加起来除以数据个数)不同,EMA 认为“越老的数据参考价值越低,越新的数据越能反映当前状态”。
数学公式与原理
EMA 的计算是一个不断迭代的过程,它的标准数学公式如下:
- :当前时刻计算出的 EMA 值。
- :当前时刻获取的新数据(比如当前帧的颜色、当天的股价)。
- :上一时刻的 EMA 值(代表了历史数据的累积)。
- :平滑系数(Smoothing Factor),取值范围在 到 之间。它决定了“新数据”在当前结果中占多大比重。
总的来说 Cloud Reconstruction Pass 平衡了渲染开销与画面质量。它通过降低每帧的实际渲染像素数(1/4),利用时间维度的积累(History)和空间维度的校验(3x3 Variance Clipping)来弥补细节,是目前主流 3D 游戏引擎处理体积云、体积雾等昂贵效果的标准范式。
CloudReconstructionPass
1
2
3
4
5
6
7
8
9
10
11
12
13
14
15
16
17
18
19
20
21
22
23
24
25
26
27
28
29
30
31
32
33
34
35
36
37
38
39
40
41
42
43
44
45
46
47
48
49
50
51
52
53
54
55
56
57
58
59
60
61
62
63
64
65
66
67
68
69
70
71
72
73
74
75
76
77
78
79
80
81
82
83
84
85
86
87
88
89
90
91
92
93
94
95
96
97
98
99
100
101
102
103
104
105
106
107
108
109
110
111
|
TEXTURE2D(inCloudRenderTexture); SAMPLER(sampler_inCloudRenderTexture);
TEXTURE2D(inCloudDepthTexture); SAMPLER(sampler_inCloudDepthTexture);
TEXTURE2D(inCloudReconstructionTextureHistory); SAMPLER(sampler_inCloudReconstructionTextureHistory);
TEXTURE2D(inCloudDepthReconstructionTextureHistory); SAMPLER(sampler_inCloudDepthReconstructionTextureHistory);
struct FragmentOutput
{
half4 color : SV_Target0;
float depth : SV_Target1;
};
FragmentOutput fragReconstruct(Varyings IN)
{
FragmentOutput output;
float2 uv = IN.texcoord;
int2 texSize = int2(_ScreenParams.xy);
int2 workPos = int2(uv * texSize);
float2 texelSizeQuarter = 4.0 / _ScreenParams.xy;
float curDepthZ = SAMPLE_TEXTURE2D(inCloudDepthTexture, sampler_PointClamp, uv).r;
half4 curColor = SAMPLE_TEXTURE2D(inCloudRenderTexture, sampler_LinearClamp, uv);
float3 worldPosCur = ComputeWorldSpacePosition(uv, curDepthZ, UNITY_MATRIX_I_VP);
float4 projPosPrev = mul(_PreviousCameraVP, float4(worldPosCur, 1.0));
float2 uvPrev = (projPosPrev.xy / projPosPrev.w) * 0.5 + 0.5;
bool bCameraCut = frameData.bCameraCut != 0;
bool bPrevUvValid = all(uvPrev >= 0.0 && uvPrev <= 1.0) && !bCameraCut;
half4 finalColor = half4(0, 0, 0, 0);
float finalDepth = curDepthZ;
if (bPrevUvValid)
{
float preDepthZ = SAMPLE_TEXTURE2D(inCloudDepthReconstructionTextureHistory, sampler_PointClamp, uvPrev).r;
half4 preColor = SAMPLE_TEXTURE2D(inCloudReconstructionTextureHistory, sampler_LinearClamp, uvPrev);
uint bayerIndex = frameData.frameIndex.x % 16;
int2 bayerOffset = int2(kBayerMatrix16[bayerIndex] % 4, kBayerMatrix16[bayerIndex] / 4);
int2 workDeltaPos = workPos % 4;
bool bUpdateEvaluate = (workDeltaPos.x == bayerOffset.x) && (workDeltaPos.y == bayerOffset.y);
if (abs(preDepthZ - curDepthZ) > 0.05)
{
finalColor = curColor;
finalDepth = curDepthZ;
}
else if (bUpdateEvaluate)
{
finalDepth = curDepthZ;
float wsum = 0.0;
float4 vsum = 0.0;
float4 vsum2 = 0.0;
for (int y = -1; y <= 1; ++y)
{
for (int x = -1; x <= 1; ++x)
{
float2 neighborUv = uv + texelSizeQuarter * float2(x, y);
float4 neigh = SAMPLE_TEXTURE2D(inCloudRenderTexture, sampler_PointClamp, neighborUv);
float w = exp(-0.75 * (x * x + y * y));
vsum += neigh * w;
vsum2 += neigh * neigh * w;
wsum += w;
}
}
float4 ex = vsum / wsum;
float4 ex2 = vsum2 / wsum;
float4 dev = sqrt(max(ex2 - ex * ex, 0.0));
float boxSize = 2.5;
float4 nmin = ex - dev * boxSize;
float4 nmax = ex + dev * boxSize;
float4 clampColorHistory = clamp(preColor, nmin, nmax);
finalColor = lerp(clampColorHistory, curColor, 0.5);
}
else
{
finalColor = lerp(preColor, curColor, 0.03);
finalDepth = preDepthZ;
}
}
else
{
finalColor = curColor;
finalDepth = curDepthZ;
}
output.color = finalColor;
output.depth = finalDepth;
return output;
}
|
Cloud Compite Pass
//TODO
总结
这套系统的主要工作在于将三个目标的有机整合:
- 物理正确的理论近似:每个近似(Decima Beer’s Law、Frostbite 积分、多 Octave 散射)都有清晰的物理动机,而不是纯粹经验调参。
- 激进的性能优化:从三级 Early Exit 到 6 步锥形采样,每一项优化都有可量化的提速倍数,并在视觉质量与性能之间找到了可接受的权衡点。
- 友好的美术工作流:Weather Texture 的通道设计、ScriptableObject 参数暴露、运行时 GUI 调试——美术师可以在不了解底层技术的情况下直观地控制云的外观。